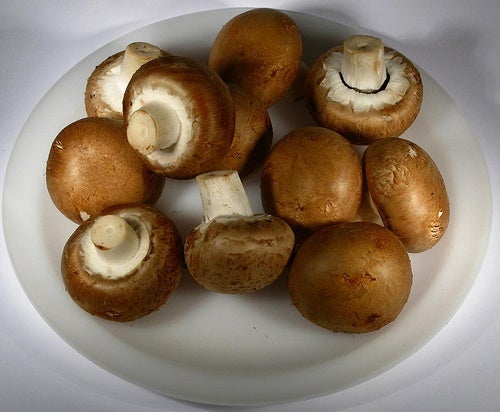
Below we will tell you how you can grow mushrooms at home in an easy, simple and fast way. Go ahead and start your own cultivation!

Growing mushrooms at home is quite easy. Best of all, you can eat them once and it will always grow back. Now, it is convenient to review some preliminary aspects.
First of all, let’s remember that mushrooms (Agaricus bisporus) are a type of mushroom widely used in cooking. In fact, both the stem and the hat are used.
The fungus is an organism that differs from plants by not having a root, stem, or leaves. It does not contain chlorophyll, so they feed on organic matter from outside. In the case of the champignon, this is an edible mushroom.
Having no seeds, mushrooms grow from spores. When the spores find the right humidity conditions, they germinate and produce hyphae, which branch and form a mass called mycelium.
Advantages of growing mushrooms at home.
- You have the satisfaction of producing your own food at home.
- It is an excellent educational opportunity since it offers the little ones the experience of seeing these mushrooms grow, something that is not possible to see in an uncontrolled environment.
- It is a very effective production, since an entire crop can be obtained from a single bullet.
- Harvesting mushrooms is very easy, so its value increases when compared to buying it at the supermarket or grocery store.
- The security of knowing that what you consume has not been processed and is genuinely natural.
How to grow mushrooms at home?
To grow mushrooms at home it is necessary to have a space for it. If we have a patio with land, we can have a section for cultivation.
On the other hand, if we live in an apartment, it is best to opt for an elongated flower pot and place it in a dark place. At this point, remember that mushrooms, given their mushroom status, do not need sunlight.
Now, growing mushrooms is easier than it seems and their production can continue until the soil finds no more substrate.
Materials.
- Mycelium in grain (you can also buy the pre-grown mushroom bales).
- 1 box (preferably polystyrene as it does not rot or decompose, apart from helping to contain humidity and temperature). This box will need a lid so make sure you get one.
Process.
Before starting, we recommend boiling the straw. This should be done to prevent it from germinating and to eliminate any traces of fungus that it already carries.
- Mix the compost into the straw evenly while moistening it a bit. If you like, you can add coffee as it can nourish the compost and favor the growth and development of the mushrooms.
- Place this mixture in the box. Keep in mind that the more substrate there is, the higher your mushroom production will be, so add as much as you can.
- Spread the grain mycelium evenly and cover this with a finger of moistened mulch with water.
- Cover the box with a lid to keep out light. You should leave it covered for 5 to 8 days. It is important that you keep the box moist during this time until you see a whitish blanket on the substrate. This means that the mycelia have colonized the substrate.
- Now prepare another lid for the box that will allow room for the mushrooms to grow. Make a central hole in this cap so that a little light enters, but always indirectly. Cover this lid with a transparent film to avoid losing moisture or heat.
- It is important that you keep the humidity at 80% but without exceeding it. If you like, you can water the inside of the lid instead of pouring water directly on the mushrooms. When this water has evaporated, you’ll know it’s time to spray again.
- You will get your first shoot in 20 days (approximately), when the hats have a diameter between 5 and 8 cm.
- Separate them from the substrate when the sheets under the hat are pink. Twist the body slightly until it separates from the substrate.
If you have followed the steps correctly, you should have a new crop every week. So you can enjoy your own organic mushrooms and prepare your favorite recipes.


